Hi everyone. This is just a very quick post to let y’all know that I have moved. You can now find me at Happily Organized Chaos now, so please click the link and go and subscribe over there. Hope to see you all soon!

Hi everyone. This is just a very quick post to let y’all know that I have moved. You can now find me at Happily Organized Chaos now, so please click the link and go and subscribe over there. Hope to see you all soon!

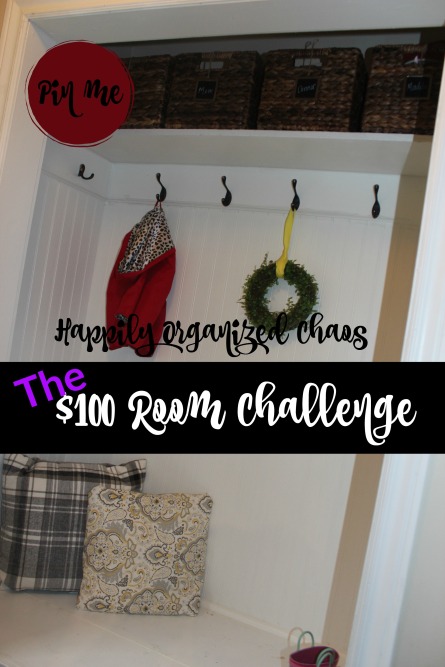
The time has finally come, yes ladies and gentleman, it is the day y’all have been dreaming of…(well, ok, it is the day I’ve been dreaming of) my $100 One Room Challenge reveal. $100 One Room say what? Well, the wonderful Erin at Lemons, Lavender and Laundry has created the $100 One Room Challenge. This is to challenge any blogger that wishes to do so, to create (or redecorate) a room or space over with only $100. I have worked hard on this area and learned 3 important lessons while at it….
1. Following a budget is hard work. Especially when you have a vision and very few good thrift stores to find items at.
2. I love a good challenge, so even when I found out that I could “technically” spend more than the $100 because I am in Canada, I decided against that and wanted to try to stick with the $100.
3. Making a vision work can be tiring but oh so worth it!
I am going to start off first and show you what the space looked like before……

This was the best picture I had of the before. (Obviously, before my blogging days)
You can see the bench was there but the cushion was getting worn, the walls needed painting and it just just needed a little refresh, after all this is the main entry that we use to the home.
Now the moment you were all waiting for……
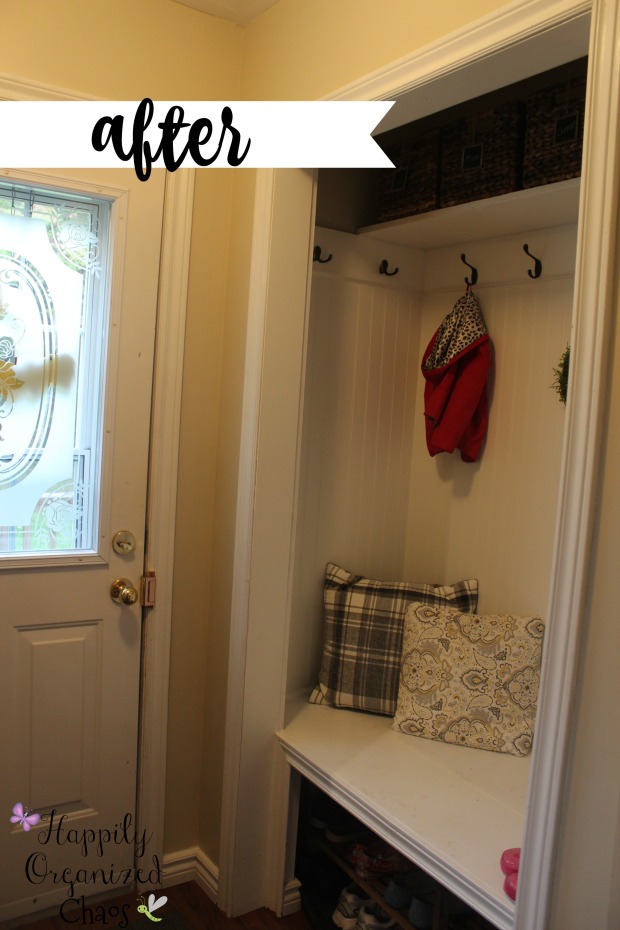
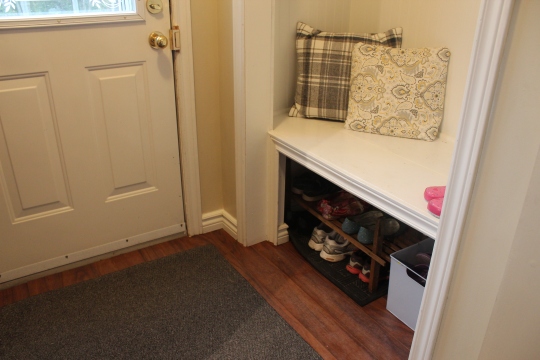
A few little updates really make a huge difference.
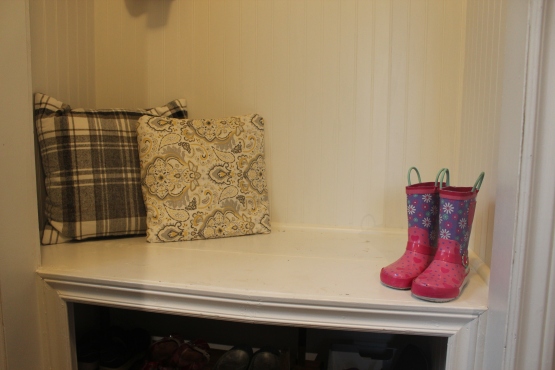
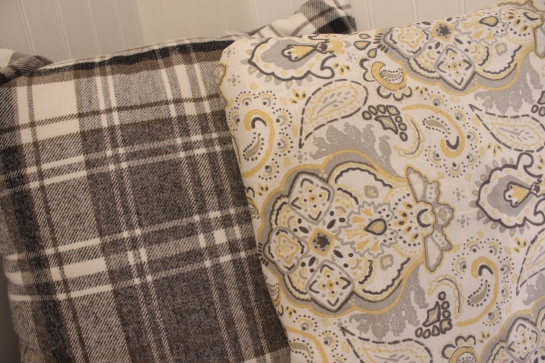
The wall color is the same and that is Manchester Tan by Benjamin Moore. I really do love that color. We took away the cushion and I re painted the wainscoting and bench in Cloud White by Benjamin Moore (my favorite white paint of all time) it just really brightens up the space. I said good bye to the old brown pillows and opted for this beautiful buffalo check from all places but Wal-Mart!! (I know I couldn’t believe it when I saw it!!) The other pillow is actually a DIY pillow cover that I made using fabric napkins that I purchased years ago at Target but never used them! (I will have a DIY post on how I made those coming up shortly!!)
Above the bench is a shelf and I had been looking for baskets to put seasonal gear in, I decided to shop home first and found that these bins from Target worked perfectly and I had even previously purchased these chalkboard labels from Target and they were just sitting in a bin. I took them out and labeled them with each family members name.
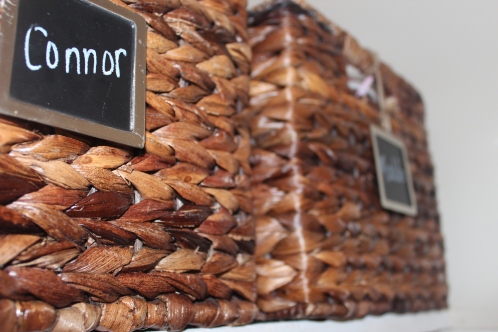
Bins and labels from Target.
Shoes were still a major problem, so to solve that I moved over the current show rack and added this blue bin from Martha Stewart that I had purchased years ago from Zeller’s (if you are Canadian I am sure you remember this store) and although I would have loved to spray paint it, I ran out of time, the bins is metal and very practical for flipflops and works perfectly in the summer.
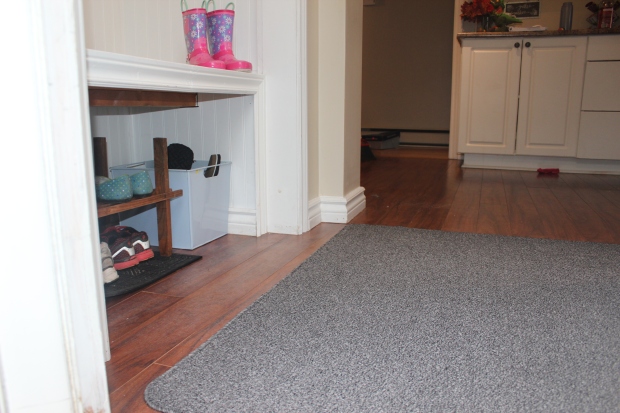
The rug is a new find from Wal-Mart and I love the grey color.
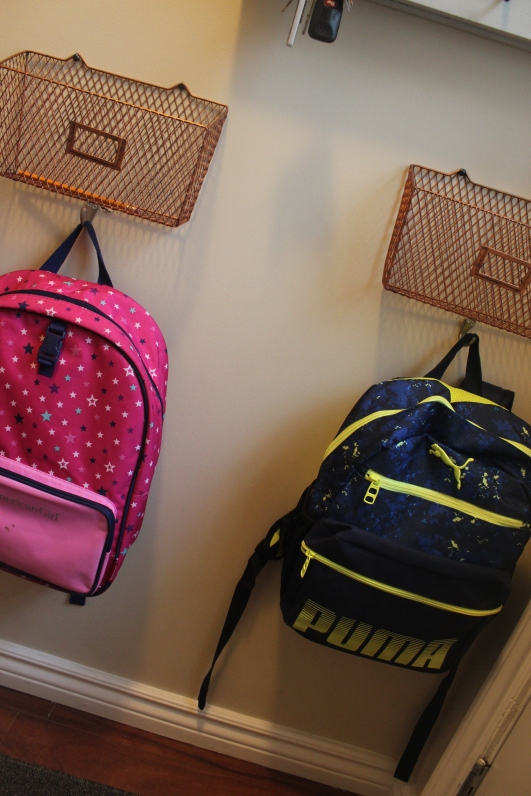
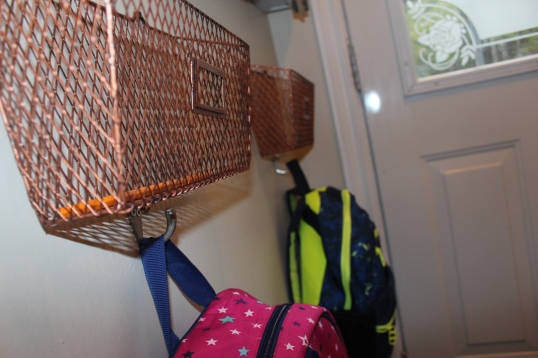
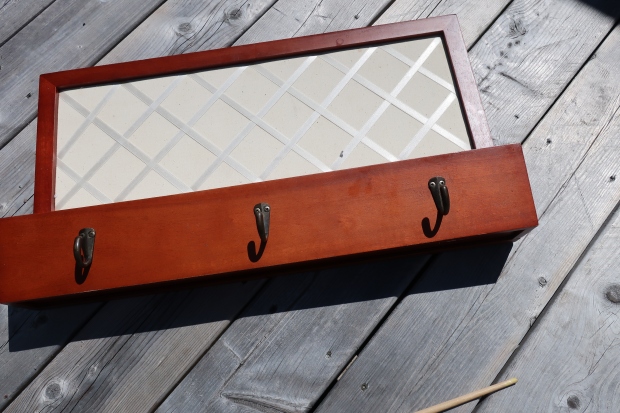
The opposite side of the bench is where I find the biggest change came. This kid drop off zone is just what we needed with both children now in school. They have their jobs as they walk in the door to empty their school bags, hang them up on the hooks under the file bins and place all school papers in the bin so I can go through later in the evening. (They also put their lunch boxes on the island for me to empty) This has helped them so much in the responsibility department.
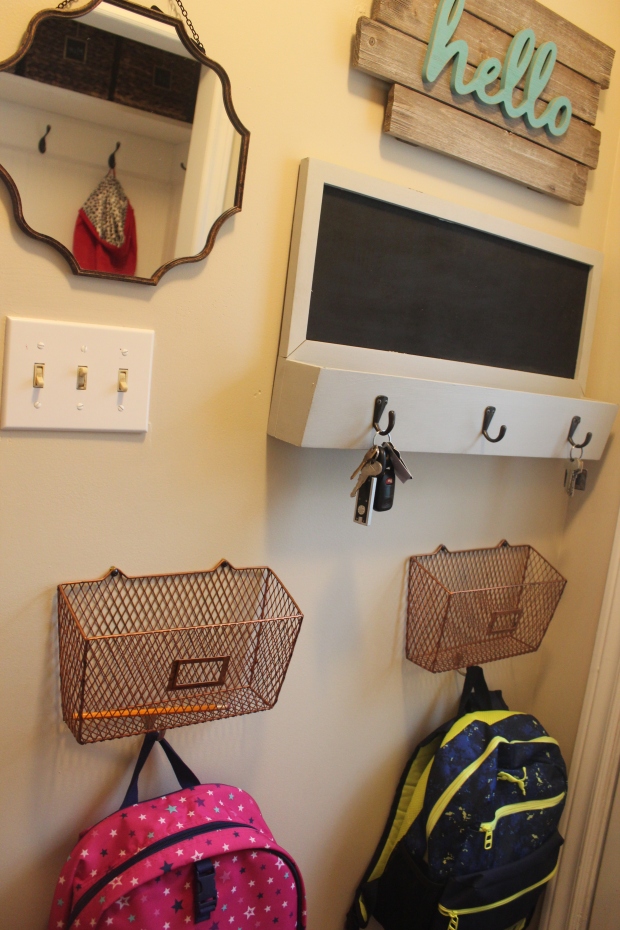
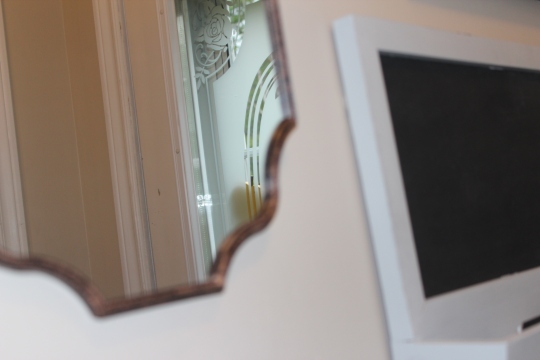
The mirror was another Wal-Mart find (on sale).
Now I am just going to show you some additional photos, keep reading to the end to see if I stayed on budget and how much each new thing cost me.
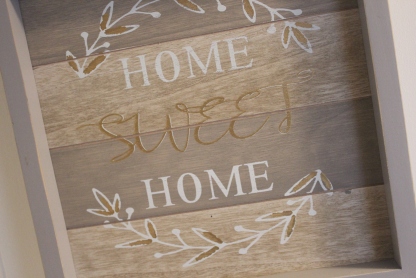
New sign from Michael’s
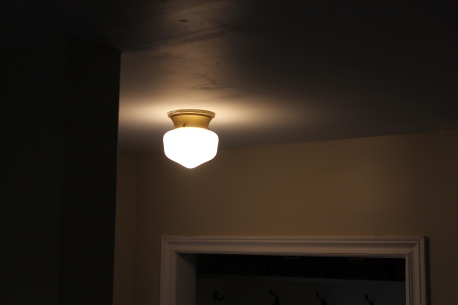
Simple little change can make a huge difference. New light cover from Home Depot Canada.

Now the part you have been waiting for, did I make this space over for $100 or less……

Well, I went over by $9.93 and well if we are making this challenge $100 USD then I actually went under because with the exchange I would have had technically $125…but I really wanted to stick to that $100 and am a little disappointed that I didn’t. What did me in was that dang pillow (which I love and can not live without) but I am happy that I was able to create a calm, peaceful space that I am happy with every time I enter (and that is a good thing considering this is the main door we use to come and go from the home!)
Again, thank you so much for joining me on this adventure. Don’t forget to check out all the other wonder participants!!

If your on pinterest don’t forget to pin me!!
Take Care and we’ll see you soon….


$100 isn’t a lot of money when you look at it. The paint alone for a space can be that whole budget, depending on what paint you decide to go with. Luckily for this particular project I do not have a lot of painting to do, and the things I do want to paint I will use some of that left over paint from other projects I have lying around. It’s a win-win all around. So I want to catch you all up on how the mud room is going. One Word…..
I feel like I am getting so much accomplished and the small changes that we have made in the space have made such a huge change in our day to day lives. The kids seem to have more responsibility and are really enjoying that. So today’s post will be short and sweet with words and I’ll show you some pictures of what I have been up to with the room…

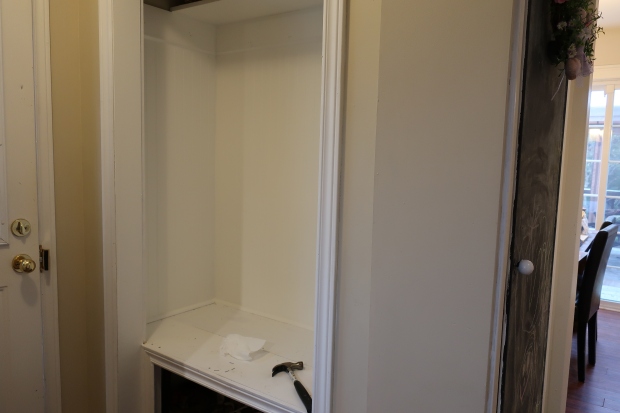
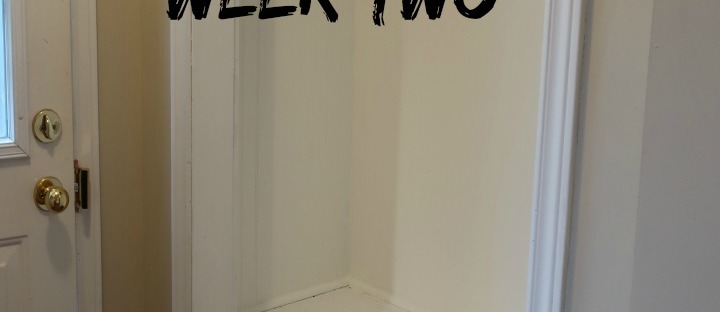
This is the space cleared out and getting ready to paint.
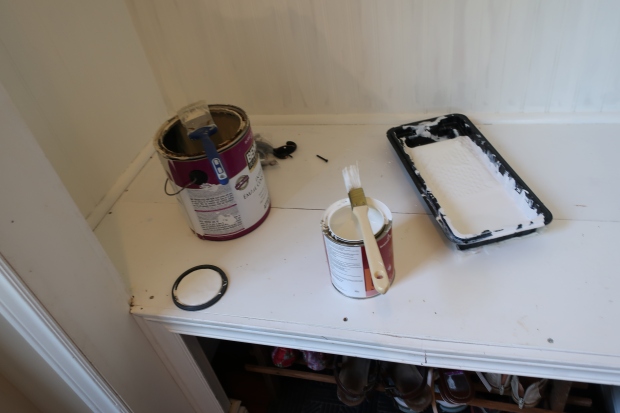
Getting ready to paint
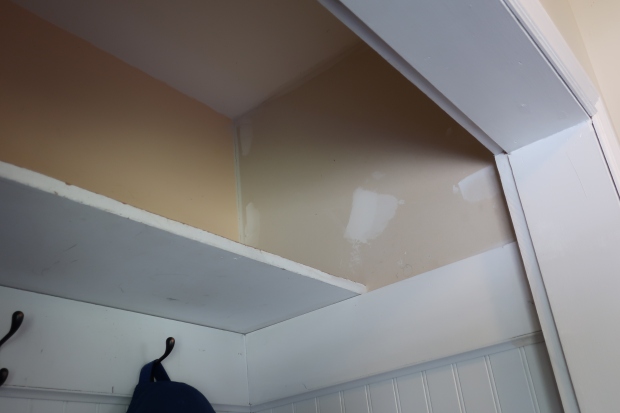
Don’t judge….yeah I never did paint that drywall….oops….better get on that!
Amazing what a fresh coat of paint can do for a space. The color is Cloud White by Benjamin Moore.
I also tackled this shelve and brought some new life to it…..you’ll have to wait to see the end result 🙂
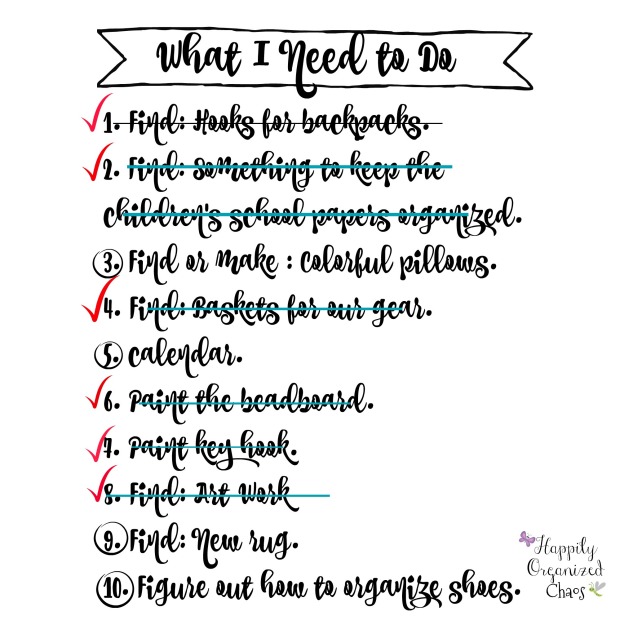
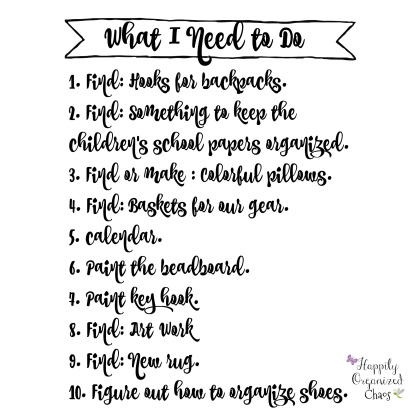
So my list still has a few items I have yet too check off and honestly I am not sure if I will actually find them. Sometimes we have to deviate from our original plans, but that is life and that is okay. Stay tuned next week to see if I actually find what I need and if I am able to pull this whole look together for $100 (or less!!) and don’t forget to go and check out all the other amazing room transformations, the link is down below!

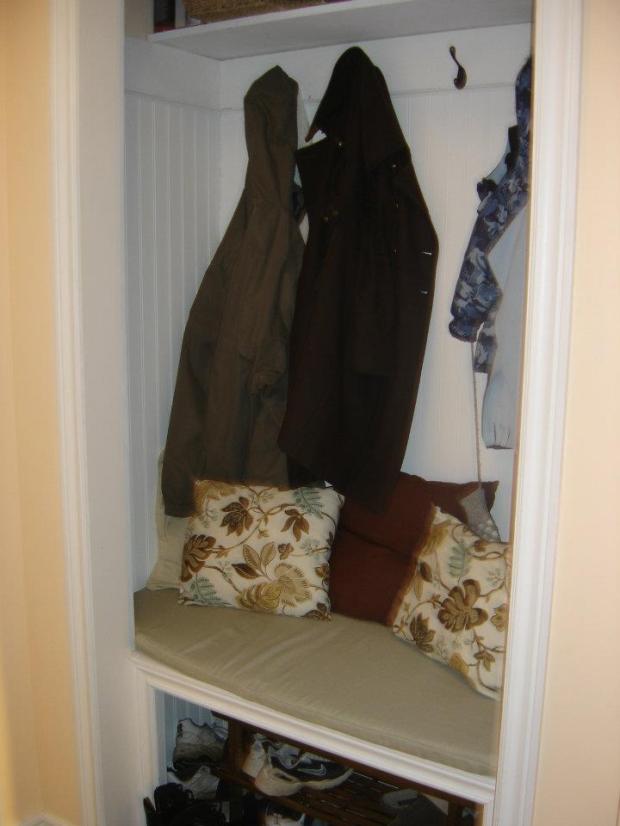
So when I decided to re-do my “mini mudroom” for this $100 challenge, I thought, no problem, this will be easy and I can complete this is no time. HA- boy was I wrong. Let me tell you how awesome Erin from Lemons, Lavender and Laundry is for being able to transform so many spaces for $100. Man, it is hard stuff. I wanted to create a practical, inviting and cozy mudroom out of a space that was originally a closet. A few years back we did do this and was so happy with the results, but lo and behold the shoes always piled up in a big heap in the middle of the room, the coats were always messy looking and hats and mittens had no where to live. The wall opposite of the bench was boring and lacked any functionality, let alone design sense.
I have a vision for what I want this space to look like and am finding it very challenging to put it all together for $100 but I am determined to do so.
Here is my vision for the space:

The room is not really a separate room, it is basically my kitchen, so the color scheme had to coordinate with the kitchen. I decided to go with grey, yellow and teal (all muted varieties of these colors). The kitchen is already Manchester Tan by Benjamin Moore and the island is Chelsea Grey by Benjamin Moore. I decided to keep those colors and work with them. You can see from this picture above I am trying to find a lot of natural materials, galvanized metals and wood tones to coordinate along with the white, grey and yellow (along with those pops of teal).
WHAT THE ROOM NEEDS
The space needs to be functional yet still stylish. It is the first room that everyone sees when they enter my house. I want to to say “Hello, welcome! I am so glad you are here” (well, it would be cool if my house could talk, but I don’t think it will actually say anything….actually that would be rather creepy if it did talk….anyways back onto the topic at hand.
So I hope you enjoy following me as I attempt to do this challenge in budget, it may be a tight one but I am determined to stick to it! Also, go and check out all the other lovely bloggers joining me in this challenge and leave them some love 🙂


September means a lot to me. It is the month that my first was born, it is the month that Autumn finally arrives, and it also marks back to school for us. Back to school, these words are bittersweet, as a substitute teacher it marks back to work, back to the unknown days, will I work or will I be home (working still on house work or the blog/YouTube or social media) Regardless, it also means extra cash spent on school supplies and necessities for the children. Both C & M will be in elementary school this year, C will be entering third grade (seriously, I have no idea how this happened!) and Ms M will be in her first year, primary. While we are all beyond excited for what the new school year will bring for them and what fun things I will purchase, I like to stock myself up with some new goodies for the school year as well. So in this post you will find my top 5 back to school essentials for mom! Grab a tea, coffee or a glass of wine and enjoy!
My Top 5 Essentials for Back To School for Mom
1. Cardigan: I always like to buy myself some new clothes but one thing that I feel is essential for back to school is a cozy, warm cardigan. This one below is the perfect combination of causal and style. It is perfect for those early morning school drop off’s when the weather is still a bit chilly.
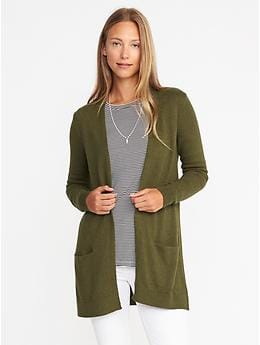
Open-Front Long-Line Sweater for Women
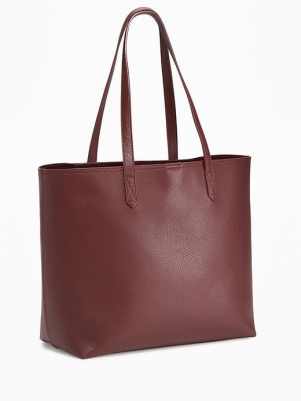
2. A large tote– I need a large bag. I have just learned to come to terms with the fact that I like to carry a lot if stuff and this bags from Old Navy is perfect. It’s a throw it over your shoulder and go type of bag (and isn’t this color PERFECT for fall?!)
3. Planner– I am 100% a planner girl, I mean seriously I have to be with these 2 kids. Between my work schedule, the kids extra curricular activities and what will be be having for dinner, I like to keep all these things in one place. This is where my Erin Condren Life Planner (ECLP) comes into play. I decided this year to go with the ECLP Hardbound Planner and am really loving it so far. I purchased this one at Staples while we were on our annual family vacation to Orlando and can’t be any happier with it.
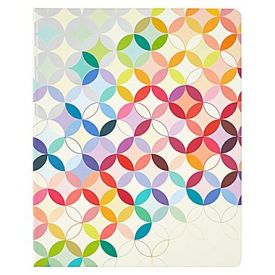
Erin Condren Hardbound LifePlanner™, 2017-2018 Midcentury Circles Colorful, 8X10
4. Water bottle– I don’t know about you but I feel that I spend half my time shuffling my children to and from activities and because staying hydrated is so important I had to include a water bottle in my list of essentials. I always like to buy a new one to start the year off. There are so many different water bottles out there, from the ones that keep your drink super cold to ones with infusers, I believe there is one out there for everyone. There are so many to choose from, how can we narrow it down?!
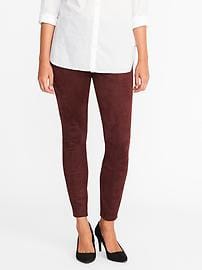
5. Comfortable Leggings- When I am not working I want to be comfortable but still stylish and this is where leggings come into play. These maroon colored leggings from Old Navy just scream fall. They are not only practical, but comfortable and cute. Throw them on with a tunic sweater or even a tee and the cardigan I mentioned above and you are all set to go.
So there you have it, my essentials for every mom for back to school time. I hope you enjoyed reading and let me know what your essentials are in the comments below. Take care.

This is not a sponsored post. All opinions are my own.
The mudroom, such a wonderful concept. A room that everyone can put all of that stuff that they were. A place to store muddy boots and hats. mittens and everything else that comes with living in a climate that actually does have 4 seasons. Unfortunately, I am not one of those lucky people that have a mudroom. Where I live homes are older and mudrooms were not popular back in the 70’s or 80’s. So we ended up making our own mudroom out of an area that we already had. Enter the kitchen closet.
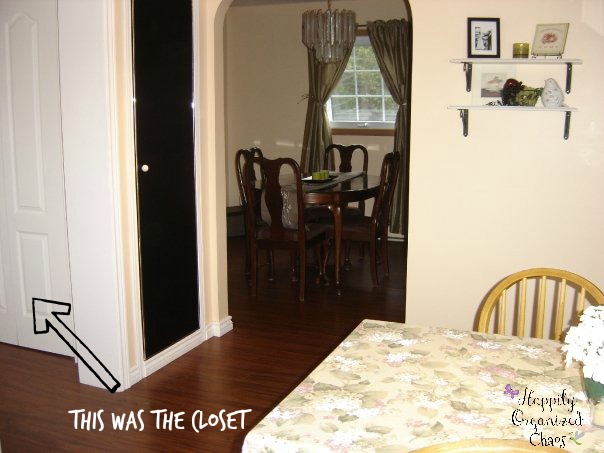
When we bought this house, “no closet space” is one thing I didn’t say. There were closets everywhere! So when I suggested to my hubby that we rip out this closet in our kitchen, he happily agreed. So that is what we did. Out with the doors and in with the bench.
Since we did that 6 years ago, our tastes (and family size) has changed. We are no longer a family of 3, we are now a family of 4 and our children are older and both in school. So what better time does the $100 Room Challenge hosted by Erin from Lemons, Lavender and Laundry (if you haven’t checked her blog out, you must do so now! It is amazing!) come into effect but September (which is our back to school month). Not only does it fall perfectly with that but being a challenge to only spend $100 is perfect because we are on a tight budget after spending 3 weeks in Florida.
So follow along with me as I change our Mini Mudroom, and see how far $100 really goes. Also, remember to go and check out all the other wonderful folks doing this challenge with me, I am sure there will be a lot of beautiful spaces to see!!So check out the link below.

I would be lying if I said that it is an easy road because quite frankly it is hard, really hard. My house is in a state of shambles, things and stuff are everywhere. Mind you I have been eliminating and de-cluttering a lot and I mean A LOT but I just can’t seem to get to the finished product. Every time I seem to make a head start and see the light at the end of the road, a big truck blocks my road and I feel like I am back to square one (figure of speech obviously). I know I will get there and that it didn’t take a simple day or even week, heck not even a year to accumulate all of this stuff that we own. It took a long time, years (I really hope it doesn’t take that long to get rid of everything).
I want to be happy when I walk into my house. I thought for a while that we needed a bigger space, that we needed more closets, a bigger pantry, more rooms… to get ourselves organized and at peace. What I realize is that is the last thing we need. What we need is less stuff, less demands and more time together as a family.
So, I am going to continue along with my KonMari journey and go through all these possessions but take it a step further and not only think “Does it bring me joy?” but also ask the question “How often do I use this? Is it practical?”
I am hoping that in the process of this journey I will find a sense of calmness and inner peace with myself and my surroundings.
Now, onto the next area to de-clutter…..

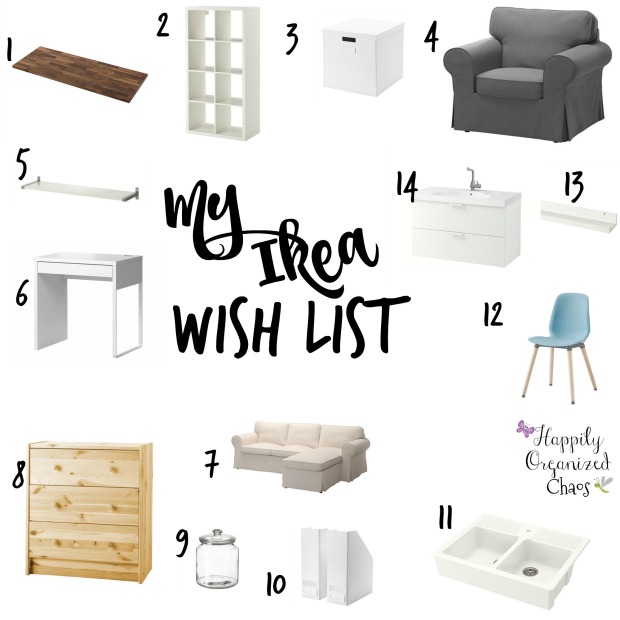
Excited is an understatement on how I am feeling that Ikea is coming to Dartmouth Crossing this fall. For years I have loved Ikea products, although I do not own any of the bigger items because it would cost me more in the long run because of shipping, but lo and behold, Ikea heard our cries in Atlantic Canada and is bringing one of their full size stores to us and even though the store is still a distance away from me, I am happy that it is driving distance and that we actually have a drop off location near our house and can get anything shipped here for only $59! So it’ll be great for those bigger items that I can’t fit in my car 🙂
I have always been an Ikea fan to the point that any city that we visit, I look up the location of the closest store. If they have an Ikea within driving distance, I make hubby spend an afternoon walking through the store with me as I dream of having pretty much everything there. Over the years I have dreamed of ordering everything and anything from there website and have compiled a list must haves. A lot of these items I am sure you are familiar with and have seen in other blogs and social media platforms, but I wanted to share with you some of my favorites that I have a feeling will be entering my house pretty soon.

The struggles of decisions. How does one decide what to do with what one has? See, we bought this house 8 years ago. 8 years ago I was (very) pregnant with my first. He was due to come on September 16th and we had a closing/moving date of August 24th. So, you can imagine the stress of moving and only having 2 weeks to get everything in and organized was just not happening. I put little thought into the placement and organization of all the rooms (except his sweet nursery, that was all set up and ready to go- you can read about that here). To get back to the point, we have this one room that has really been the “catch all” room. It has went from TV room, to playroom, to office space, back to a playroom and now I call it the “messy room where things go to die”.
I have really been thinking about the direction and focus of my blog and YouTube channel lately and how having a dedicated space for writing and filming my be helpful, especially when the children are home. I just am not sure if this would be considered “greedy” or “selfish” for me to choose a room to have just for myself and not give that space to my whole family or my children.
Why do we as mothers always put the needs of others ahead of ourselves? I know I have written about making sure that we take time for ourselves (which is something else I still really struggle with) but when it comes down to getting something for us versus using that money or space for our children, our children usually win out because it feels wrong to think about ourselves before them. Am I making sense? I think we need to let go of this stigma and remember that we are important too and (as I have said in the past) we are the glue that holds the family together and sometimes, just sometimes, we need to put us before others.
I am still on the fence on what to do with this room.

This is the room when we first moved in. We made it into a TV room. (2009).
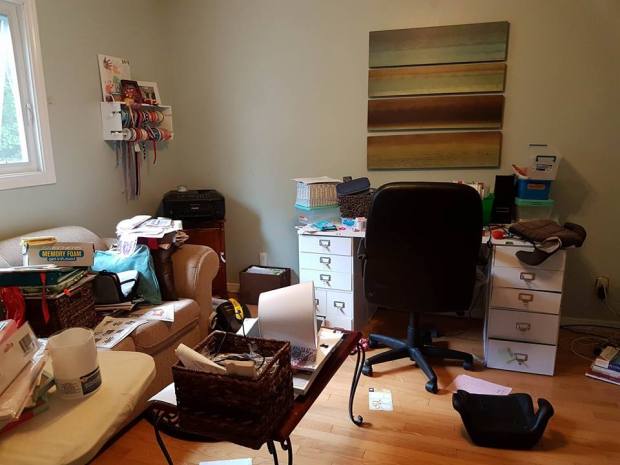
This is what the space looks like now. (2017)
Another view of the space as it is currently. (2017).
It would make an amazing home office space I know. I have so many ideas (and I promise to share if I decide to do the room). Let me know if you have your own dedicated space just for yourself, whether it be a home office or just a “mom cave”. Are you guilty of putting the needs and wants of your children or others ahead of your own?
Take Care and Hugs,


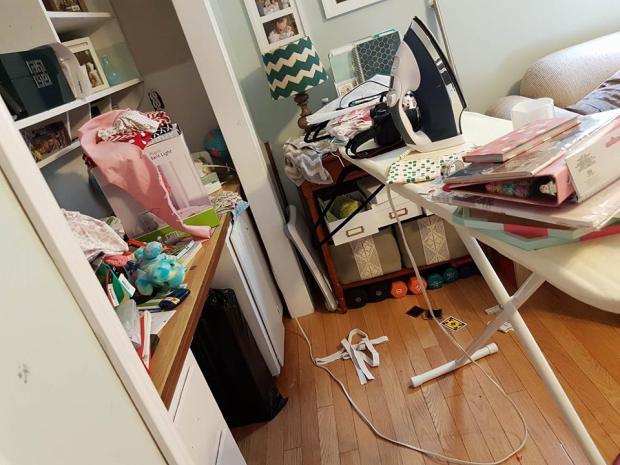
As promised, a few weeks ago, I mentioned that I would do a budget breakdown of our master bedroom from the one room challenge. Honestly, if my life would be more organized, then maybe I would remember where I put those dang reciepts (but what fun would that be) So it took me a while to find them, and guess what?! I finally did!! So here I go on the breakdown on what I spent to complete this (what I consider) major transformation of our master bedroom during the April 2017 One Room Challenge 🙂
The room started off being this boring beige color that the previous owners had painted. I have no idea what the color was called, and it worked well in the beginning with my bedding but I was ready for something brighter and lighter. I went with my favorite brand of paint, Benjamin Moore and decided on a color that I already had in the house and loved, Grey Owl.


Next I wanted new furniture, but that just wasn’t in the budget. I had to work with what I had and that was this dresser that were 30 years old, 2 night stands that were too short and another cream color dresser (that I actually really liked as it was).


A few pieces of wood, a light sanding and some My chalk paint, Benjamin Moore’s Chelsea Grey and some chalk paint wax and BAM! You have what looks like new furniture and looks so nice against the light color walls.


(Side note, I purchased this wax brush from Michael’s for $20 and it was a complete waste of money! The bristols came off as soon as I used it in one stroke!)
You may also notice that the end tables have some nice, simple new lamps on them. I scored those at Wal-Mart (again) for only $17.97 a piece (can you say major score!!)
The bed was another thing that we had to work with, one day we will get a king size bed but in the time being we worked with what we had. I bought this new bedding from QE Home/Quilts.
It was on sale for $30. Then I picked up a bed skirt from Wal-Mart, along with 4 pillowcases (2 solid white and 2 solid navy) Those were pretty inexpensive, each were only $10.97 for the 2 blue and $14.97 for the 2 white. The headboard was another DIY project that I completed, some foam ($35), fabric ($42) and a free headboard I found on the side of the road. Voila, a new bed!!
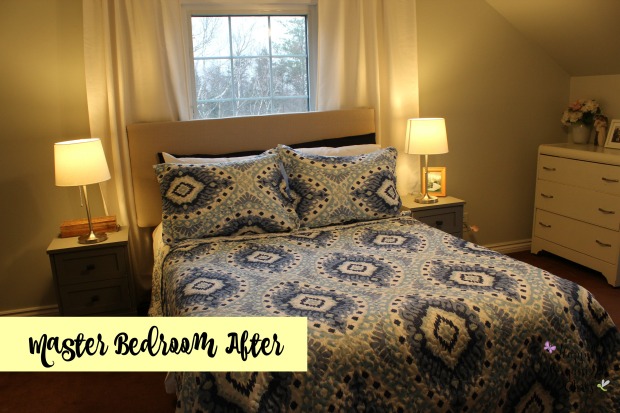
The drapery was another score from Wal-Mart (and no this makeover was not sponsored from Wal-Mart, I just happened to find a lot of great deals there) They were just putting out a new line of drapery and I found these, a pair of 2 panels for $24.97!! (Amazing deal if you ask me!)
There are also a few accessories around the room (but not too many as I was trying to keep the room pretty simplistic)
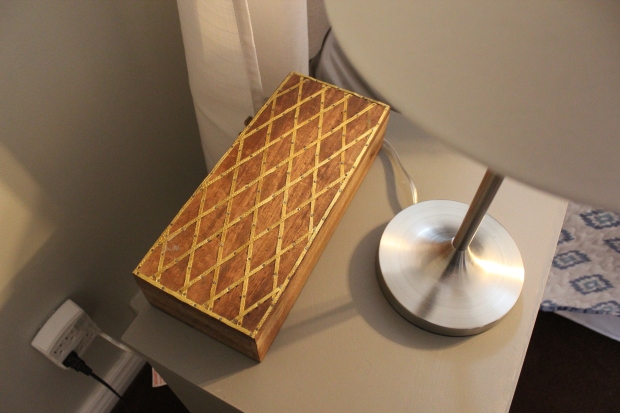
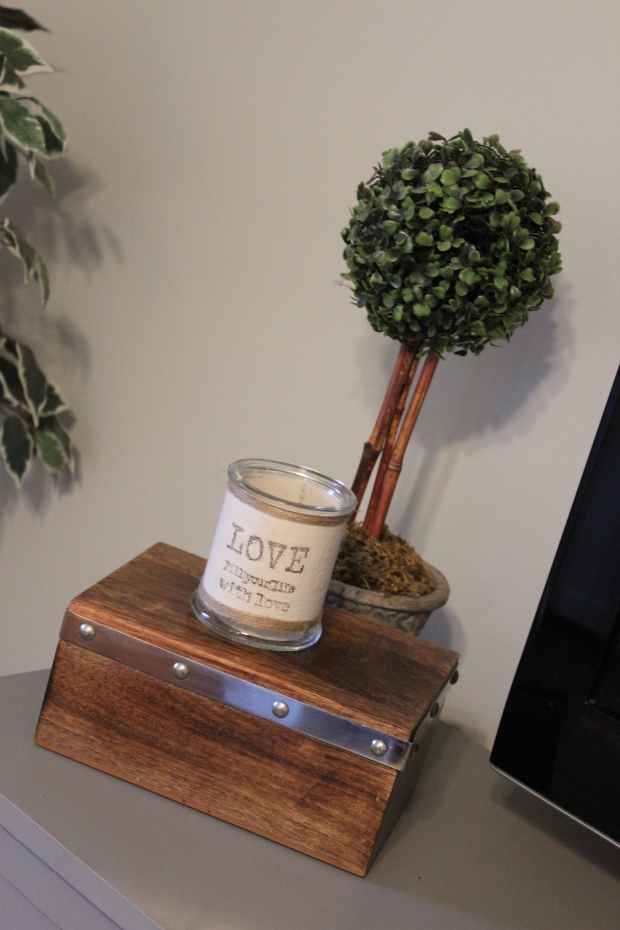
This box not only looks pretty but…
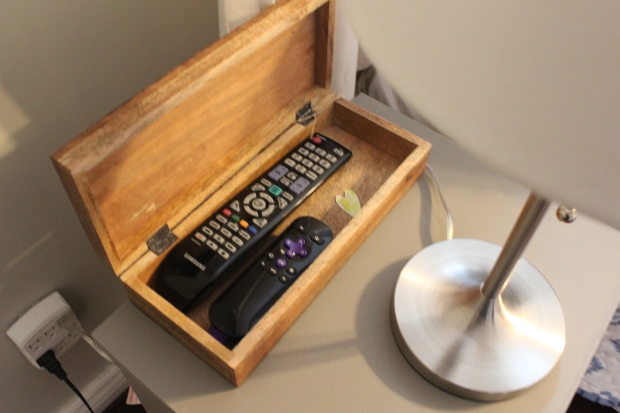
it is practical and hides our TV remotes (Winners, $12)
The wooden box on the dresser ($7) and candle holder ($2) both were clearance items from Wal-Mart and the plant was free from my parents.
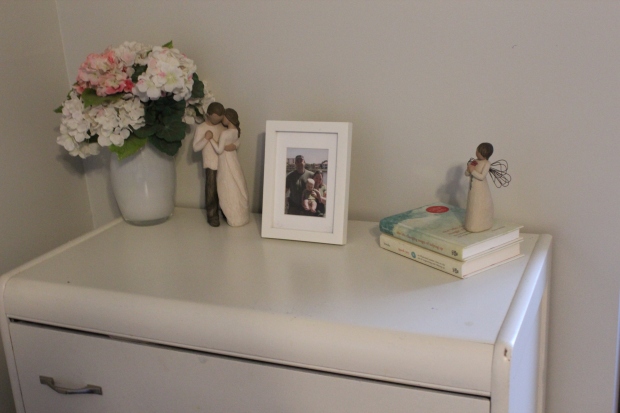
The picture above the television was a Winner’s find for $9.99 and the farmhouse inspired art was from Michael’s and I used a 40% off coupon, making it $22.


All the accessories on this dresser I already owned 🙂
So that is a complete breakdown of how much I spent to complete this bedroom makeover.
I was able to finish this project for under $500 and I believe that it is a major difference and looks like I spent more than that.

Thanks for taking the time to read and take care 🙂